This post is also available in: Russian
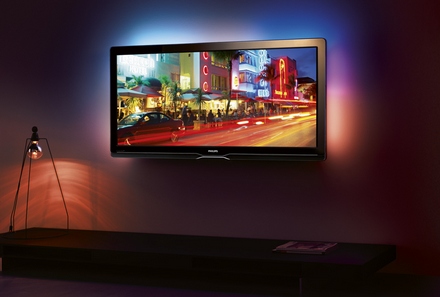
Flash video players become more interesting and complex, and almost as functional as home video systems. We wrote some time ago about DVR, dynamic bitrate and other functions (how to implement them in your player – not yet available in english at the moment). Now we will talk about implementing beautiful dynamic background lights like it made in Philips TV sets.
In order to make this design feature we need a little bit of ActionScript 3 programming and several minutes of Flash Media Server configuring. We will go through the process by creating simple OSMF video player with Ambilight effect applied. First of all let’s discuss mechanics: ambilight effect is getting done by applying Blur filter with big distortion (x and y) to the video screen. Blurred image is placed behind real video screen and blurred edges look like ambilight effect from video screen. Simple and nice.
Flash Media Server
In order to apply Flash filters (i.e. Blur filter) to video stream Flash Media Server should give such permission. The permission gives access to the BitmapData of video frames from Flash video players. Responsible for the feature parameter is called VideoSampleAccess. You should enable it in Application.xml configuration file (probably you will find some template for that in file already). Sample config code:
1 2 3 4 5 | <Client> <Access> <VideoSampleAccess enabled="true">/</VideoSampleAccess> </Access> </Client> |
The value “/” gives access to all applications video data.
Flash Player
After this we are ready to develop simple video player. OSMF could help us to make this in less than an hour. Simplest video player code provided below:
1 2 3 4 5 6 7 8 9 10 11 12 13 14 15 16 17 18 19 20 | // Import Ambilight class import com.video.effects.Ambilight; // Create video stream connection var resource:StreamingURLResource = new StreamingURLResource("rtmp://FMS_ip/vod/content.f4v"); var loader:NetLoader = new NetLoader(); var videoElement = new VideoElement(resource, loader); var mediaPlayer:MediaPlayer = new MediaPlayer(); mediaPlayer.media = videoElement; // Add video screen to the stage and position it var container:MediaContainer = new MediaContainer(); container.width = 800; container.x = 110; container.y = 110; addChild(container); // Link video screen to video source container.addMediaElement(videoElement); // Apply Ambilight video effect to video screen only var amb:Ambilight = new Ambilight(container); // Add Ambilight video effect to the stage addChild(amb); |
In the code above there are only two lines of difference from the sample OSMF video player. These are Ambilight object construction and adding it to the Stage. You could download Ambilight class here.
Ambilight class is really simple and pretty well commented. It implements algorithm below.:
- During construction it creates BitmapData object where later it draws blurred copy of video screen
- Reorders display objects in order to make blurred copy of video screen lay below real video screen (it gets video screen in constructor parameters)
- Adds event listener to ENTER_FRAME event in order to update ambilight effect every frame
- Every time it enters new frame it copies real video screen image, blurs it, apply ColorTransform to make it more realistic
During design development, pay attention that ambilight effect looks better on dark background. It should be mentioned that Ambilight effect is very CPU intensive (image filter every frame) that’s why that sometime it is better to disable this feature (on netbooks as example). When entering FullScreen video mode you should manually disable Ambilight effect beacuase even invisible it will consume a lot of CPU.
Demo
You may check how such an effect could look like for Avatar video trailer here.
